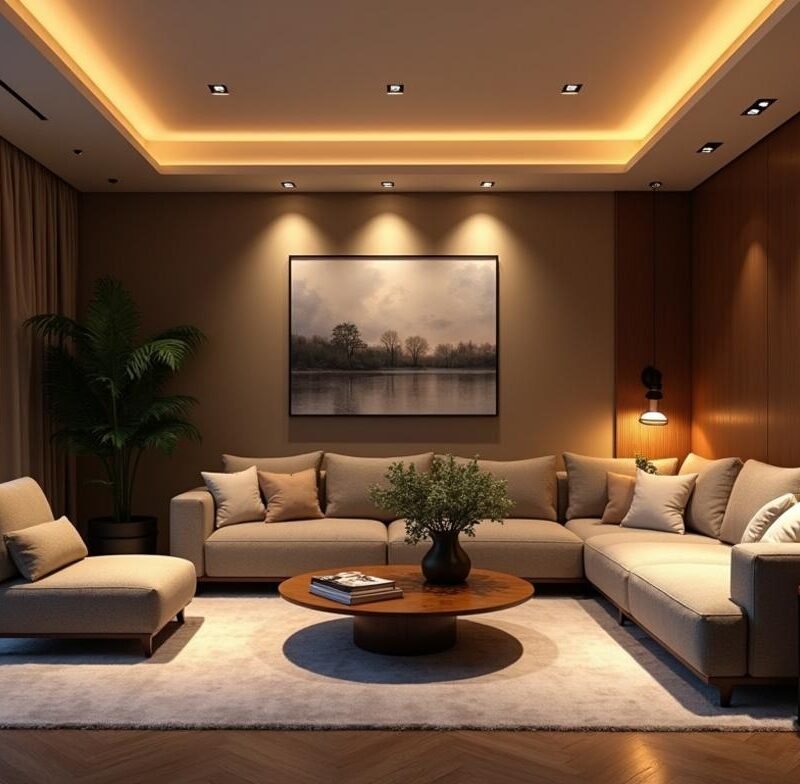
Darker evenings change how a room works. A living room that felt bright at 6 p.m. in June can feel flat, shadowy, and tiring by 4:30 p.m. in November. The fix is rarely one stronger ceiling light.
Good interior design lighting layers combine ambient, task, accent, and decorative light. Each layer has a job, and each should switch separately where possible. The result is more flexible, more comfortable, and easier on the eyes after sunset.
Start with the light level each room needs
The Illuminating Engineering Society gives recommended illuminance ranges by task and setting in its residential lighting practice, RP-11. As a practical home guide, aim for 100 to 200 lux for general living areas, 300 to 500 lux for reading or kitchen prep, and around 50 lux for soft evening circulation. A lux meter app can give a rough reading, but a dedicated meter gives better consistency.
Think in zones rather than whole rooms. A sofa needs lower, warmer light than a kitchen island. A hallway needs enough light to show steps, thresholds, and door handles. The UK Health and Safety Executive notes that poor lighting can contribute to slips and trips, especially where level changes are hard to see.
Ceiling height also matters. In rooms under 2.4 metres high, flush or semi-flush fittings usually spread light better than long pendants. In rooms over 2.7 metres, pendants, wall lights, and tall floor lamps help bring light down to eye level. This reduces the gloomy “bright ceiling, dark faces” effect.
Build the base layer before adding mood
Ambient light is the background layer. It lets you move through the room, find objects, and avoid strong contrast between bright screens and dark corners. It can come from ceiling fixtures, wall washers, uplighters, cove lighting, or large shaded lamps.
Ceiling light without the harshness
If you use downlights, avoid spacing them in a rigid grid across the whole ceiling. Place them where light is needed, such as near wardrobes, worktops, or circulation paths. A common spacing guide is half the ceiling height between fittings, so a 2.4 metre ceiling suggests about 1.2 metres between downlights.
Choose a beam angle to suit the job. A narrow 24-degree beam creates strong pools of light and sharper shadows. A wider 60-degree beam spreads light more softly across seating and circulation areas. For darker evenings, dimmable fittings make more difference than adding extra fixed brightness.
Wall lights for darker corners
Wall lights work well where ceiling lights leave faces in shadow. Mount picture-style or shaded wall lights around 1.5 to 1.7 metres from finished floor level. This keeps glare away from seated eye height while still brightening vertical surfaces.
Vertical brightness makes a room feel lighter than floor brightness alone. The Chartered Institution of Building Services Engineers highlights the role of uniformity and glare control in visual comfort. In practical terms, one wall light on a dark chimney breast can change the perceived brightness of the whole seating area.
Match the task layer to real activities
Task lighting should sit close to the activity. It should not force you to turn on every light in the room. In darker months, this layer often does the most work because evenings include reading, cooking, laundry, hobbies, homework, and screen use.
For reading, place the light source slightly behind the shoulder and to the side. The bottom of a lampshade should sit near seated eye level, usually 105 to 120 centimetres from the floor. This reduces glare and keeps light on the page rather than in the eyes.
For kitchen worktops, aim for 300 to 500 lux on the surface. Under-cabinet LED strips should sit toward the front of the cabinet, not tight against the wall. That position lights chopping boards and pans instead of mainly lighting the splashback.
Desks, crafts, and close work
A desk lamp should have an adjustable arm, a shaded head, and a stable base. Place it opposite your writing hand to reduce shadows across paper or keyboards. For detailed sewing, model making, or paperwork, 500 lux is a sensible target.
Colour rendering matters for close work. Look for a CRI of 90 or above when judging colours, fabrics, paint samples, or food. Many basic LED bulbs sit around CRI 80, which works for circulation but can flatten reds, blues, and skin tones.
Use accent light to stop rooms looking flat
Accent lighting creates depth. It highlights texture, artwork, shelves, plants, fireplaces, or architectural details. Without it, a room can feel like a lit box, especially after sunset.
A useful rule is to make the accented object about three times brighter than the surrounding area. If a wall sits near 100 lux, a picture or shelving bay can sit around 300 lux. Stronger contrast creates drama, but it can feel tiring in small rooms.
Place picture lights so they cover most of the frame width. For recessed spotlights aimed at art, set the fitting about 30 degrees from vertical. This angle reduces reflected glare and avoids long shadows from frames.
Shelves, niches, and textured walls
LED tape works well in shelves, alcoves, and joinery. Choose a continuous diffuser if you can see the strip directly. Dots of bare LED often look cheap in evening light.
For open shelves, place the strip at the front edge and aim it backwards. This lights objects and book spines instead of only illuminating dust at the back. In deeper shelves over 30 centimetres, a second concealed source may be needed.
Choose colour temperature and controls carefully
Colour temperature affects how evenings feel. Warm white around 2700K suits living rooms, bedrooms, and dining spaces. Neutral white around 3000K works well in kitchens, bathrooms, and utility rooms. Cooler 4000K light can feel alert and clinical at night, so use it sparingly at home.
The Energy Saving Trust notes that LEDs use far less electricity than traditional incandescent bulbs and last longer. When buying dimmable LEDs, check that both the bulb and dimmer are compatible. Flicker, buzzing, or sudden cut-off usually means the dimmer load range does not match the lamps.
Smart bulbs help renters and anyone without rewiring plans. Wired dimmers suit larger renovations because they keep wall controls intuitive for guests and family. A good dimmer should fade smoothly down to roughly 10 percent output without flicker.
Warmer evenings by schedule
Set evening lighting to shift earlier than sunset. In winter, start dimming bright task and ambient lights about 60 to 90 minutes before bed. Keep bedrooms and living rooms warmer, lower, and more indirect during that period.
Use brighter task light only where needed. A reading lamp at 2700K can still support concentration without lighting the whole room. In hallways, low-level plug-in night lights can guide movement without fully waking the eyes.
Decide which setup fits your home
Different homes need different layers. The best choice depends on room use, wiring access, ceiling height, and whether you rent or own. Use the table as a starting point before buying fittings.
| Situation | Best lighting approach | Conditions to check |
|---|---|---|
| Rental flat with one pendant | Smart bulbs, plug-in floor lamps, table lamps | Use 2700K bulbs in living areas and avoid overloading sockets |
| Low-ceiling living room | Flush ambient light, wall lights, shaded lamps | Keep fittings close to ceiling if height is under 2.4 metres |
| Open-plan kitchen diner | Separate kitchen task, dining pendant, soft living lamps | Put each zone on its own switch or scene |
| Dark hallway or stairs | Wall lights, low-glare ceiling fittings, step-level light | Light changes in floor level and first stair clearly |
| Home office in living room | Adjustable task lamp plus dimmable background light | Keep screen area below high contrast at night |
If you can only change one thing, add task lighting where you actually sit or work. A floor lamp beside a sofa changes evening comfort faster than a brighter central bulb. Choose a shade that hides the bulb from normal seated positions.
If you are renovating, plan circuits early. Ask for separate switching for ambient, task, and accent layers before plastering starts. Retrofitting extra switches after decoration often means chasing walls, patching plaster, and repainting sections.